Monday, August 29, 2011

Duke Kaleidoscope Quilt

I committed to making this quilt back in May....and thought I would have all summer to get it done.  Well, summer just came and went, and here I am trying to cram an entire quilt into 2 days!

My husband and kids left for school at 7 on Friday, but I didn't start working until about 9:30.  I was able to get all 64 blocks pieced by 5.  I took one of my best friends out to dinner for her birthday, so I couldn't work on it again until Saturday.  I finally finished the quilt in the wee hours of Sunday morning.

I drank a LOT of iced coffee, snacked M & Ms, and watched seasons 2, 3, and part of 4 of The Office.  I just love that show...so politically incorrect, but so funny!!

Here is the finished product, and besides the fact that it's a Duke (blech :o) quilt, I really like it!  I sure hope he likes it :o)  This is my 2nd kaleidoscope quilt, and I think I did much better with my seam allowances and points this time around!  I definitely think I would make another kaleidoscope quilt again.


Seriously, though, I am SOOOOOO glad to get that off my plate.  I love to sew, but when I have deadlines, I just don't enjoy it as much.

Friday, August 26, 2011

No-Fray, No-Sew Rolled Rosette Tutorial

I've been asked many times how I make my rolled rosettes.  I'm not a big fan of the frayed look...I like it clean so I can see the fabrics better and honestly it just lasts longer.


Materials:
2.5" strip of fabric, length depends on how big you want your rosette.  I generally use 22 inches.
glue gun
small square of felt

1.  Fold the raw edges of fabric towards the center of your strip of fabric.


 Make a tight knot at the end of the strip.  Make sure you keep your raw edges folded in as you tie your knot.  The tighter you make your knot, the better your rosette center will appear.

2.  Keep your raw edges folded in as you start your rosette.  Hold onto the knot's tail and bring fabric down as you turn around the center.  This will help keep the center nice and tight.


Twist around the center and glue every 2 turns.  I keep my fabric flat and fold it around the center, keeping the top of the rosette tighter than the bottom.  Place a dab of glue towards the bottom of the fold.  This will help keep the glue from oozing out the top!  You can also use fabric glue, but I found hot glue is faster and just as good.


Here is a closer picture of how I fold my fabric around the center.  I just keep the raw edges folded in and keep folding around the center, gluing every 2 turns.  


3.  Once you have rolled, glued, and rolled some more you should have a rosette ready to finish!  Snip the tail of the knot you originally tied.  Take the last bit of fabric you were rolling and glue it to the underside of your rosette.


Place a bit of glue in the fold before you wrap to the back.


Now you're ready to attach it to your felt backing.  Put a generous amount of glue on the back of the rosette about 1/4" away from the edge.  


Press your felt into the back of your rosette, forming it up and into the rosette.  This helps the rosette keep it's nice rounded top shape.


Trim the felt around the felt backing.  If you glue right to the edge, you end up seeing the felt when it gets attached to a headband or whatever else you are embellishing.  So trim it 1/4" from the edge.


All done!

Wednesday, August 24, 2011

WIP Wednesday #6

I haven't been doing much quilting lately, small things here and there.  I re-opened my shop early and am swamped.  I think I need to hire an assistant.  Anyway!  I am currently working on another Kaleidoscope quilt using Duke fabrics for a dear friend's son who is leaving in less than a week for college.  I have all my pieces cut out and plan to use the ENTIRE day tomorrow getting that sucker pieced, basted, quilted, and bound.  It has to get done tomorrow, because I have no other time this week to do it...EEEK!!!  Why, oh why do I wait until the last minute??


I had heard that some people get a lot of relaxation out of hand sewing...so I took up hexagons.  I really like them, but man are they a lot of work!!  I've had to stay off my foot a lot, so these little guys are great for making me still feel useful.  I would like to make a whole quilt top out of them, but we'll see...right now my piece is big enough to fold in half and make a purse, or square up for a pillow.  I'm going to keep going though!  It's a great to-go project and uses up lots of scraps :o)

So, this weeks stats:

In progress:  7
Completed:  0
Started:  2
Total:  9

I'm linking up at Freshly Pieced, and if you haven't yet, vote for Lee's fabric design at Connecting Threads!

WIP Wednesday at Freshly Pieced

First Day of School 2011

Today is the first day of school for my kiddos....1st and 3rd grades.  Wow, where has the time gone??  My husband took them shoe shopping yesterday and they must have had miracle grow over the summer because my older daughter is now in a size 5 after ending the school year in a 3.  Not sure how that happened!!  Anyway, I was up at 5:30 this morning, pre-heating the oven, showering, packing lunches, making breakfast, curling hair.  At 6:45, I had exactly 15 minutes to get myself ready...good thing my hair is pretty low maintenance!  Just blow and go.  Out the door by 7:00 and to school by 7:20.  Whew!


I am not sure who is more excited for this new year, but I sure do wish it would slow down a little.  I am feeling the time slip through my fingers, and I am trying to grab it and hold on a little longer.  This year, Emma and I have started writing each other letters, kept in a composition notebook.  When I write something, I put it under her pillow and she does the same.  She's getting to where she needs more private time, but it's hard to get with a little sister always underfoot.  It's a way to keep connected.  I sure do love my little ones!!


Monday, August 22, 2011

My Thoughts on Nasty Comments

This weekend has been an interesting one.  I spent a lot of it in the recliner, keeping my foot elevated.  I am still struggling with this injury.  I have missed work, church, social activities and it's just getting old.  I know it's just going to take time, but sometimes it's just hard to be patient.  I know I don't have it nearly as bad as other people do, so I am not going to dwell on it.

I got my first nasty blog comment this weekend, too.  I have heard about people who leave nasty remarks...several bloggers I follow have dealt with this.  But this was the first time I experienced it myself.  I have to say, it knocked the wind out of me.  I know that putting my work out here in such a public forum makes it accessible to everyone, but you would think people would have more manners than to be nasty.  Really, is it necessary??  Makes me feel like we're in junior high all over again!  I have had my fill of mean people and I'm really quite over them.  The thing about this person is that she felt so liberated to be just outright mean, but posted it from "anonymous" like a coward.  Really??  If you're gonna be mean, then own it.  Put your name on it so people can see you for who and what you really are.  My last bit of advice comes from my mama, "If you don't have anything nice to say, don't say anything at all."  Period.  Why is being nice so dang hard for some people??  Ugh, I just don't understand.

This one comment has caused me to question my online presence.  I really had some great plans for this blog.  Not to make money, like others do (not criticizing that at all!)  I just don't have time to post every day, even though I'd love that!  I have learned so much as a self-taught quilter/crafter/cook/etc that I just wanted to share what I know in the hopes that it can help someone else just learning.  I'm never going to be anything fancy, just plain ole me :o)  My first reaction to this nasty person was to just delete my blog (may have been an over-reaction, lol!) or to stop posting.  But, no, I'm not going to do that.  I'm going to keep doing what I love and sharing it here.  If you like it great, if not, oh well.  But keep the negative, mean, hateful comments off my blog, because they will be deleted asap.

Now that I have had my say about that.....I just got in some new fabric this past week and it makes my heart happy :o)  My husband got me the entire line of Joel Dewberry's Heirloom for our anniversary...all 39 FQs.  I am in love!  I think I want to make a Swoon quilt out of some of it, but don't have plans beyond that.


I also got some adorable FQs of the Going Coastal fabrics...reminding me so much of my beautiful home state of California!


Wednesday, August 17, 2011

Giveaway at Sweet and Sassy!!


I try not to over use my blog as a shameless promotion of my boutique business, but I wanted to let you all know about a GIVEAWAY happening right now on my Facebook page!  I am giving away one of our Back to School bundles, valued at over $20, once we hit 600 fans!  If you already are a fan, you can suggest others like it...each person who says you sent them will earn you an entry. You earn entries by either becoming a new fan and/or suggesting it to others.

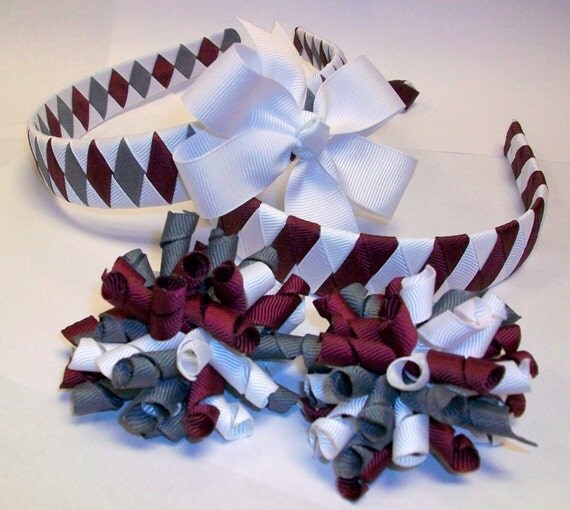
SCHOOL SPIRIT Hair Accessory Bundle-- 2 Headbands and 3 Bows--You choose up to 3 School colors or Uniform Colors

You might be in the category of people who don't have kids, or girls, or your girls are too old for the bows shown...that's okay!  If you like, you may choose to receive a $20 credit to my shop!  Use it for gifts or for yourself, because all ladies need some love too :o)

Non-Slip Acrylic Templates

I've been using a lot of acrylic templates for cutting fabrics lately.  One thing I hate about acrylic templates is how they sometimes slide when you're cutting.  And of course, it always slips at just the WRONG time in the cutting process.  There are special non-slip dots you can buy that help with the slipping, but they are just expensive for the number of dots you get in the package.  So, my cheaper solution is the Duck brand rug tape you can buy at Walmart for about $8 per roll.  It sticks well to acrylic, lays flat between the template and your fabric, and is very effective in keeping those acrylic templates from sliding while cutting!  The best part is that the roll is huge and should last forever.


Monday, August 15, 2011

13 Years

Thirteen years ago today, I married my best friend.  We met at college, the very first week.  I was the outgoing California girl taking ID card pictures, and he was the shy southern boy who came thru my line.  We didn't meet again for 2 weeks, but when we sat next to each other in English class and I heard his southern drawl, I knew I would marry him someday.

It's been an amazing 13 years...even though we've had some bumps and struggles along the way.  Those struggles have taught me so much about God's goodness and grace.  In the past 5 years, my husband has had 3 brain tumors, 3 surgeries, and 6 weeks of radiation.  The first tumor was the size of a golf ball pressing on his optic nerve causing him to lose his vision and have horrible headaches.  Every 6 months is a check-up MRI, never knowing what that might bring, but God is always good even when the report isn't.  It's very likely he'll have more tumors, but for now, it's clear.  There may come a time when he has a tumor pop up that brings the worst news...cancer.  The doctor thought the 3rd one was cancer.  Those were dark days....I thought I would lose my best friend and end up raising my 2 little girls alone.  I smiled for him and for the kids, but wheeling him into surgery a 3rd time....it just crushed my heart.  Hours later the surgeon reported no cancer, just a benign tumor.  He would still have his 6 week recovery, but I still had him with me.

I really am thankful for the struggles.  I appreciate and love him so much more than I think I would have without those hard times.  Sometimes I feel like we're living on borrowed time, but isn't everyone?  No one really knows what's around the corner or what the day may bring.

I love so many things about him.  I love that he's big and super strong.  He gives the BEST bear hugs ever...I used to ask him to squeeze me as hard as he could and without even trying he'd squeeze so hard I almost couldn't breathe!  Then I would try and couldn't make him flinch!  I love that he is a faithful man, loyal to those he loves.  He's a wonderful Christian who loves the Lord more than anything else.  He invests himself each school year, trying to touch as many kids' lives as he can.  he's quiet and firm, but cares so much.  He's fun and and has a great sense of humor.  And he's such a fun, sweet daddy to our 2 girls, too, which makes me love him more.  He loves me and puts up with all my insanity :o)  The list could just go on and on.

Happy 13th Anniversary to my best friend!

Wednesday, August 10, 2011

WIP Wednesday #5

I had a very productive week last week...even thought I think August is rolling by WAY too fast!!  In 2 weeks, my girls are starting back to school...sigh.  We have had an amazing summer, but it's just time for them to get back into a routine.  They are definitely going to be busier...Emma is going to be in 3rd grade and will be starting to get some experience with putting projects together.  I'm not sure if I'm more excited than she is, but it's going to be fun to help her!  Dayna is going into 1st grade...she's getting so great at reading, it just makes me happy!

We are going to do our back to school shopping this weekend...again very excited!!  There is just something about that whole department in the store that always makes me giddy...I know that's crazy!

But onward to quilty projects!!  I have 2 more quilts finished this week, whoohooo!!  I finally finished the binding on my New Wave quilt and a Valentine quilt.  And I haven't been able to get pics of them since they were finished, so that will have to come later.  Lots of people have asked about the New Wave quilt pattern.  I found it here at OhFransson and then the acrylic template here at TabSlot on Etsy.

New projects started include my Dresden Plate quilt.  I have just pieced the plates and that's it for now.  I have a sweet friend of mine with her "baby" going off to college soon and I need to get that quilt done, so for now, that will be my focus.  I just bought all the fabric last night...and he leaves in 2 weeks.  Why do I wait until the last minute???  I will post pics once there is something to post about :o)


Lastly, because I just can't seem to sit back and enjoy doing nothing, I have taken up hand piecing hexagons!  They are super easy and fun!  I just started a couple days ago and already have 40 done.  I am sure I will need 20x that, but that's okay.  Gives me something to do in the car to and from work (my husband drives :o) and to and from wherever else!  I just take my little basket with me and sew my little heart out.

aren't they cute!!

I think I might have some kind of ADD or something...I just can't let my hands be idle.  Even when watching a movie with the hubs, I still feel like I need to be multi-tasking.  Does anyone else have that problem??

This week's stats:
New projects -3
Completed projects - 2
Currently in progress - 11


Linking up here at Freshly Pieced!  There are some gorgeous quilts people are working on...puts me to shame!

WIP Wednesday at Freshly Pieced


Tuesday, August 9, 2011

Slap Your Mama Homemade Mac and Cheese

I live in the South, where macaroni and cheese is literally referred to as a vegetable.  I will never forget the first time I went a local restaurant and saw it listed on the veggies to choose from list...really??  Not only that, but my husband used to eat it daily for breakfast...that and fried chicken.  Yep, for breakfast.  Mercy.  I come from California where mac and cheese is a health hazard....at least the way I make it!!  I've been asked many times to share my mac and cheese recipe.  It is made with all natural, full fat ingredients but that is exactly what makes it amazing!!


Ingredients:

16 oz. dry elbow macaroni
4 cups 2% milk (could use skim or whole)
4 cups shredded sharp cheddar cheese (pre-shredded is fine, but doesn't melt as nicely as block cheese you shred yourself)
1 stick butter, NOT margarine :o)
1/2 cup flour
2 tsp table salt--I add this once the water boils for the noodles (to taste)
2 tsp Lawry's Seasoning Salt (to taste)

 1.  Cook macaroni according to package directions.  While cooking, shred your cheese and measure out all your ingredients...set them all by the stove top ready to be added.  Once noodles are cooked, place in strainer and place hot pot back on the burner.  When I first made this, I tried to cook the noodles and the sauce at the same time, but it's just easier to this way!


2.  Over medium heat, place whole stick of butter in your pot.


Julia Child would be so proud, a whole stick of butter!  Let it melt and get frothy.  


Add your 1/2 cup flour all at once and whisk together immediately.  This is why you need your ingredients measured and by the stove top!  

 The butter and flour will make a wonderful paste (roux).
 Let it bubble while you whisk for about a minute....then add the Seasoning Salt.  The Seasoning Salt was a happy accident, but gives it such a wonderful taste!  Don't you love how I measure! Whisk together until all mixed together.


3.  While continuing to whisk, add milk, about 1 cup at a time.  You do NOT want to add all at once, for 2 reasons: the milk might curdle and it will take forever for the sauce to heat through.  Keep whisking until your sauce begins to thicken.  It takes about 5 minutes, but just keep whisking :o)


4.  Once your sauce has thickened, add your cheese all at once.


Glorious sharp cheddar cheese!!


Continue to whisk until the cheese melts in the sauce.  This can happen anytime between 1-5 minutes.  Just keep it up until you raise your whisk and there are no more cheese shreds left!

5.  Add macaroni to the sauce mixture and mix.  Pour into a 9 x 13 pan and cover with shredded cheese.  Bake at 375 until golden brown, or until you just can't stand waiting any more and have to have some!  There are times I will reduce the milk a bit and not bake at all, but serve straight from the pot!  If you plan to make this ahead of time and refrigerate, increase your milk by about 1/4 cup to prevent it from being dry when you re-heat.

There you have it!  Sorry for the long post, but I hope you enjoy!

Friday, August 5, 2011

Under the Knife

Now that I have cleared a couple of projects from my WIP list, I have been dying to start some new things!  I am trying to branch out with trying some new patterns and techniques.  So, my Flea Market Fancy fabrics are going under the knife for a Dresden Plate quilt.


I thought I would have a harder time cutting into my stash of FMF, but it was easier than I thought...after all, it's just fabric, right :o) 


Here are my 2 glorious stacks of FMF Dresden Plates!  I made 6 small and 6 large...I only had very small pieces of some of the FMF fabrics so the Dresden Plate pattern was perfect as there was very little waste.  I still managed to save my itty bitty scraps...I just can't throw them away! I wish I had more of certain prints, but they are so hard to find!

Large plates measuring about 12 inches in diameter

Small plates measuring about 9 inches in diameter

I still have to work out how I want to arrange the plates...and I am not super great at applique.  I have a picture in my mind of what I like, I just hope I can translate that into real life!

Related Posts Plugin for WordPress, Blogger...